Like On Facebook

.::.::Search::.::.

Wednesday, December 14, 2011

How to create cool Christmas greeting card with snowflakes and colorful tree baubles in Photoshop CS5


In this tutorial I will give you some tips on how to Christmas greeting card with snowflakes and colorful tree baubles in Photoshop CS5. You will learn how to add a Layer Style, draw Christmas baubles with Ellipse Tool, apply brushes, use Custom Shapes etc. Layered PSD file included. So let’s get started!

Final Image Preview

How to create Christmas greeting card with snowflakes and colorful tree baubles in Photoshop CS5
Start working by creating a new document (Ctrl+N) in Adobe Photoshop with the size 1920px by 1200px (RGBcolor mode) at a resolution of 300 pixels/inch. Click on Add a layer style icon from bottom part of the Layers panel and select Gradient Overlay.

Sunday, December 11, 2011

Three Simple Elegant Headers Text Effects


This tutorial will explain three different ways to create very simple yet elegant header-style text effects, using only two Layer Styles each time.
The Final Result:
Simple Elegant Headers
Notes:
* the software used in this tutorial is Adobe Photoshop CS5 Extended
* the size of the final result image is 1024 * 768
* you might want to check the Basix Page to see some useful topics on dealing with Photoshop basics, such as loading palettes and some shortcuts.
Resources:
old paper texture by ~klimek.
Brush Pack-Horizontal Dividers by ~MouritsaDA-Stock.
Effect 1: Drop Shadow and Gradient Overlay
- The example used is the current TEXTUTS header. The Background color is #f4f2ed, and the text color is #b95886 but you can use any colors you want.

Old Decorated Metal Text Effect


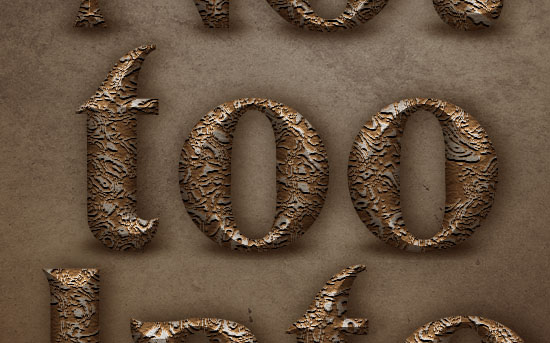
This tutorial explains how to use Layer Styles to create a metal text effect, and then add a very nice decoration texture using only a couple of filters, without the need for brushes or texture images. After that, some adjustment layers will be added to give the final effect an aged look.
The Final Result:
Old Decorated
Notes:
* the software used in this tutorial is Adobe Photoshop CS5 Extended
* the size of the final result image is 1024 * 768
* you might want to check the Basix Page to see some useful topics on dealing with Photoshop basics, such as loading palettes and some shortcuts.
Resources:
Untitled texture 66 by ~untitled-stock.
TIP: Whether you’re using an old version or a new one, your host could handle this. You could check some hosts compatible with these versions online.
Step 1:
- Set the Foreground color to #919191, and the Background color to #493728, then, create a Radial Gradient from the top center of the document to one of the corners at the bottom.

Nice Chocolate Bar Text Effect


This tutorial explains how to create a simple pattern, then how to use it along with a couple of layer styles to make a chocolate bar like text effect. It then explains how to modify a simple brush to add a nice filling to the text, and finally, adding some adjustment layers to complete the effect.
The Final Result:
Chocolate Bar
Notes:
* the software used in this tutorial is Adobe Photoshop CS5 Extended
* the size of the final result image is 1250 * 800
* you might want to check the Basix Page to see some useful topics on dealing with Photoshop basics, such as loading palettes and some shortcuts.
Resources:
The tutorial explains how to create the pattern to show some useful tips and tricks, but here is the pattern if you want to skip that.

Saturday, December 10, 2011

A cool Bright Tinsel Text Effect


In this tutorial, we are going to use some brushes, layer styles, and different blend modes, to create a super fun looking tinsel-like text effect.
The Final Result:
Tinsel Text Effect
Notes:
* the software used in this tutorial is Adobe Photoshop CS5 Extended
* the size of the final result image is 1024 * 768
* you might want to check the Basix Page to see some useful topics on dealing with Photoshop basics, such as loading palettes and some shortcuts.
Resources:
Moons and Stars – 17 Brushes by *Ashqtara.
soft bokeh texture by =night-fate-stock.
Step 1:
- Set the Foreground color to #eeebe9, and the Background color to #f5a883, then, create a Radial Gradient from the center of the document to one of the corners.

Thursday, December 8, 2011

Cool Stars Candy Text Effect


This Photoshop tutorial will show you how to use a stars-candy texture to create a nice stars candy text effect.

Final Image Preview

Stars Candy Text Effect

Resources

Sunday, December 4, 2011

Create a Cool Shiny Sparkles Text Effect


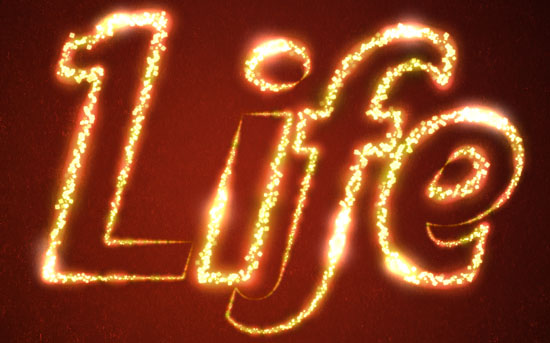
This tutorial will explain a very simple way for creating a nice glowing sparkles text effect, using a couple of brushes and glow layer styles.
The Final Result:
Shiny Sparkles
Notes:
* the software used in this tutorial is Adobe Photoshop CS5 Extended
* the size of the final result image is 1024 * 768

How to create Happy New Year A Cool 2012 Colorful Greeting Card in Photoshop CS5


Today we’ve got a really nice and simple tutorial demonstrating how to create abstract Christmas card with colorful shapes using simple tools and techniques like Ellipse Tool, Brush Tool, Layer Style, etc. in Adobe Photoshop CS5. Layered PSD file included. Let’s get started!

Final Image Preview

How to create Happy New Year 2012 Colorful Greeting Card in Photoshop CS5

Thursday, December 1, 2011

How to Animate a Demo of an iPad App with Photoshop


Step 1 – Blank canvas

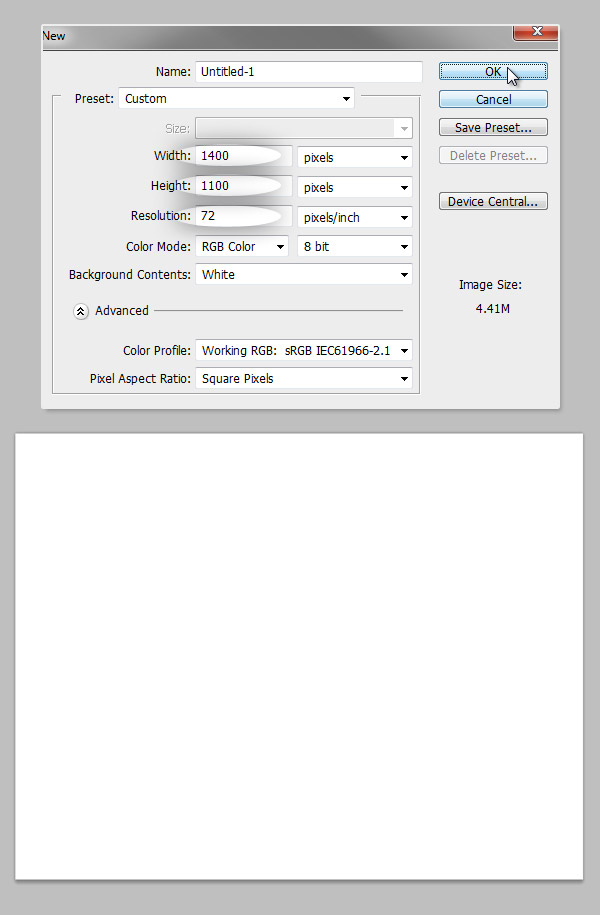
Every great design start with a blank canvas, this time we will create a 1400 x 1100px document RGB at 72ppi.

Tuesday, November 29, 2011

Create cool 3 Retro MP3 Players in Photoshop


Step 1

Create a new file. Set Width and Height to 900×900 at 72 PPI Resolution. Now create a new group and name it Player Shape or Body, inside that group create a new layer.


Create a cool Detailed Vintage Typography with Illustrator and Photoshop


Before We Begin

Before we start this tutorial, It’s important to have a bit knowledge and experience in Adobe Illustrator. Why are we using Illustrator? Because it offers great possibilities to customize any typeface, achieving excellent results and obtaining smooth curves, borders and shapes in a high quality vector file. Also, it’s recommened take the advantages of a graphic tablet. It doesn’t have to be a big one, I work with an A6 Wacom Tablet and It works perfectly for every technique described on this tutorial. Let’s go!

Step 1

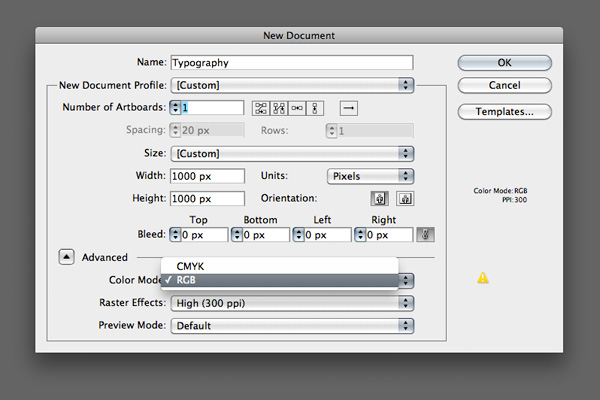
First, open Adobe Illustrator and create a new document 1000x1000px, RGB, 300ppi.

Step 2

By selecting the Type Tool (T), we will select the font for our text. In this artwork, I used a free typeface called “Creampuff” (you can find a link on the assets description).
This was a tribute artwork to the soul singer Solomon Burke, so I typed “Solomon Burke” on my canvas. For a better view, I wrote my text in small and capital letters to select the most aesthetical for our composition.

Sunday, November 27, 2011

How to create an Cool Impressive New Year 2012 card with Cool Neon text in Photoshop CS5


If you want to learn how to create an impressive card for the holiday, then we have an awesome tutorial for you. I’m going to show you how use brushes and Layer styles in Photoshop CS5 to create eye catching digital illustration with neon text effect. Layered PSD file included. Let’s get started!

Final Image Preview

How to create an Impressive Greeting card with Neon New Year 2012 text in Photoshop CS5
Start working by creating a new document (Ctrl+N) in Adobe Photoshop with the size 1900px by 1200px (RGBcolor mode) at a resolution of 300 pixels/inch. Select the background layer in Layers panel and click on Add a layer style icon from bottom part of the Layers panel to select Gradient Overlay.

Designing Cool Text And Customizing Cool Background In Photoshop


In this tutorial, you will learn how to design a simple yet eye catching text style in the most uncomplicated manner.
1. Create a new document with Width 600, Height 340.
2. Set the Gradient Tool as shown below.

Monday, November 14, 2011

Reader Tutorial: Flaming Car in Photoshop


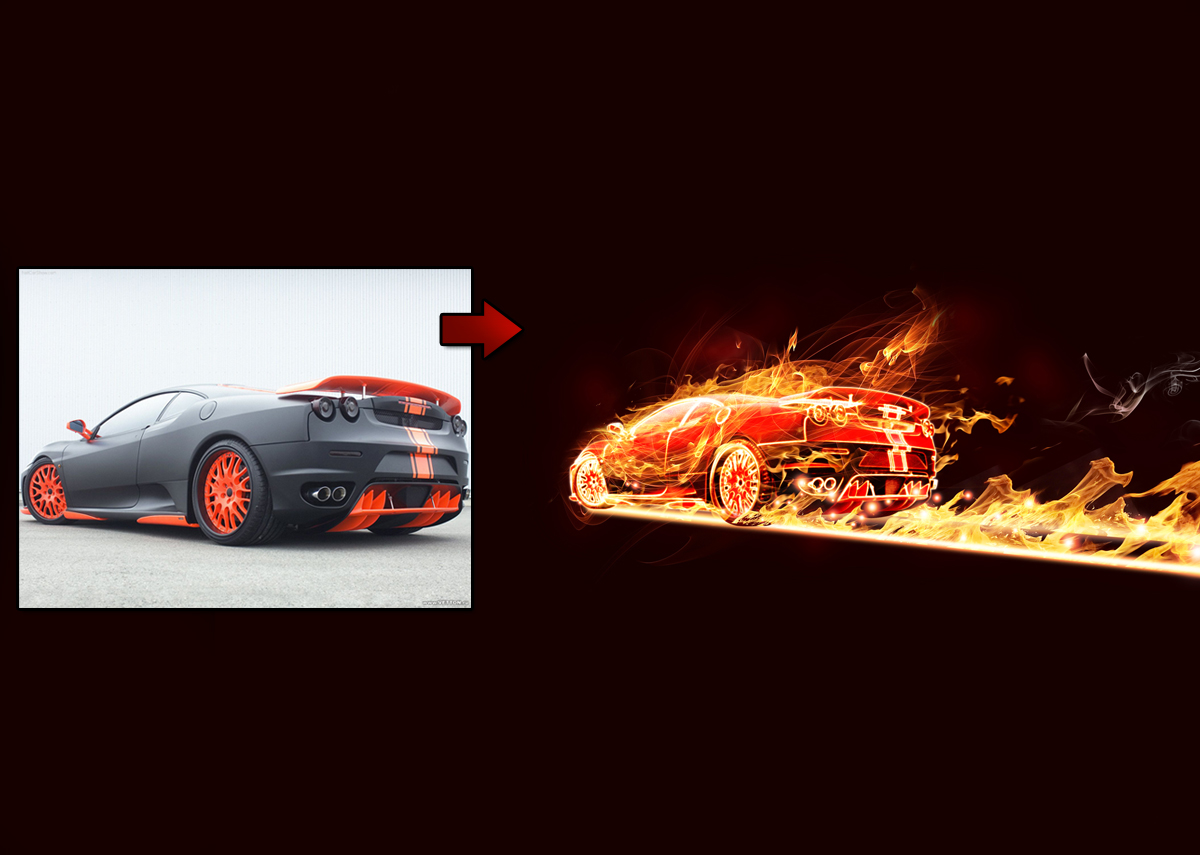
This week’s tutorial we will show you how to create a flaming car. We saw this effect before and it’s quite simple but it’s a good exercise and the result is quite good. You can also apply this effect on other images.

So let’s do that.

Step 1

Open Photoshop and create a new document. Make the background with a mix of black and red (#160000). Then with the image of a car with no background. For this first step the idea is get the outlines of the car for our image. To do that, it's pretty easy. Create a new layer by duplicating the car's layer. Rename it to "Base" and hide the original. Go to Image>Adjustments>Invert.
After that go to Filter>Stylize>Find Edges. Repeat the same thing again in order to have another layer but for the Blend Mode use Hard Light. After that you can merge those 2 layers into one.
Reader Tutorial: Flaming Car by Lincoln Soares

Awesome Light Effects in Fireworks


STEP 1 - THE O

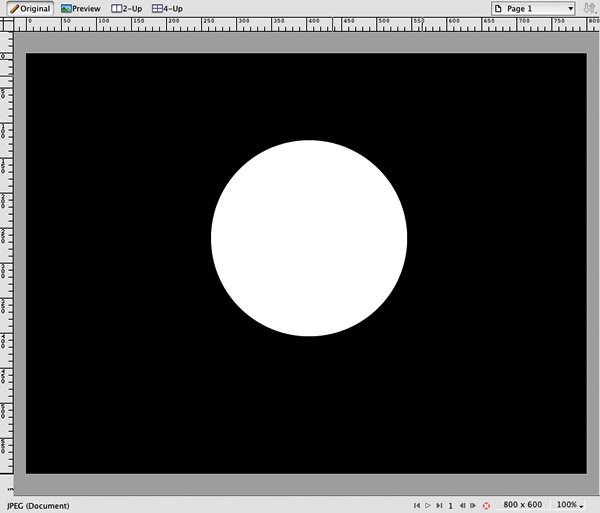
To start up, just create a simple white circle in the middle of the canvas.
James White O Series in Fireworks

STEP 2 - RADIAL GRADIENT

Now set a radial gradient for the circle. Use the color #000 for the center and #FFF for the borders. Note that we move the black color near to the white. Also use an opacity of 55%.

Thursday, August 25, 2011

Fireworks Tutorial: Water Drop


1

Start out by drawing a circular object on your canvas. (I modified mine a little so that it looks little more like a drop.)
Set the Fill Color to #CCCCCC and the Stroke Color to #B1B1B1.

Glass Text - Fireworks Tutorial


Requirement

All Fireworks versions
You will need to install the 'Loki Cola' font before doing this tutorial, (but you may use any font you like). You can get it free at Dafont Loki Cola

Tutorial

    Final Product What You'll Be Creating

    Step 1
  1. Install the Loki Cola font,
  2. Create a new document 500x500 pixels, canvas colour white, resolution 72,
  3. Create the text Coca-Cola with these settings:
    • Font size: 96
    • Anti-Alias: smooth
    • Colour: #FF0000

Comment