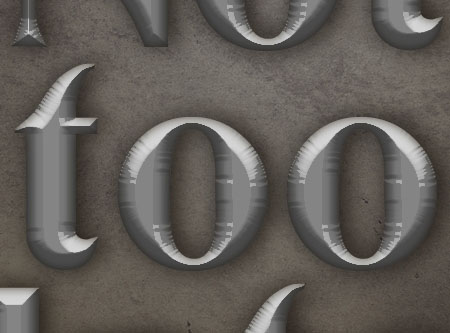
This tutorial explains how to use Layer Styles to create a metal text effect, and then add a very nice decoration texture using only a couple of filters, without the need for brushes or texture images. After that, some adjustment layers will be added to give the final effect an aged look.
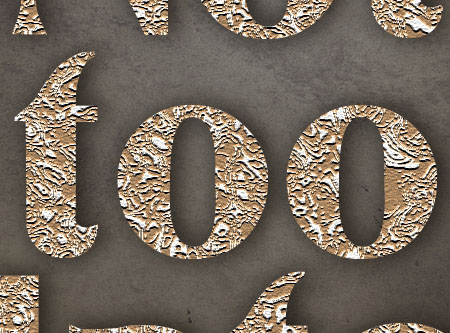
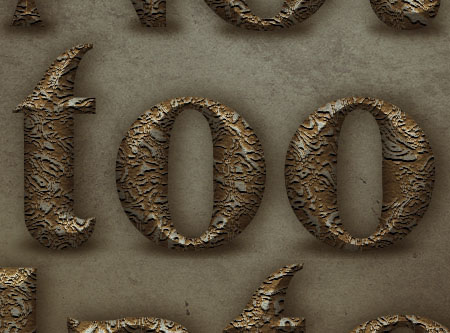
The Final Result:

Notes:
* the software used in this tutorial is Adobe Photoshop CS5 Extended
* the size of the final result image is 1024 * 768
* you might want to check the Basix Page to see some useful topics on dealing with Photoshop basics, such as loading palettes and some shortcuts.
* the size of the final result image is 1024 * 768
* you might want to check the Basix Page to see some useful topics on dealing with Photoshop basics, such as loading palettes and some shortcuts.
Resources:
* Untitled texture 66 by ~untitled-stock.
TIP: Whether you’re using an old version or a new one, your host could handle this. You could check some hosts compatible with these versions online.
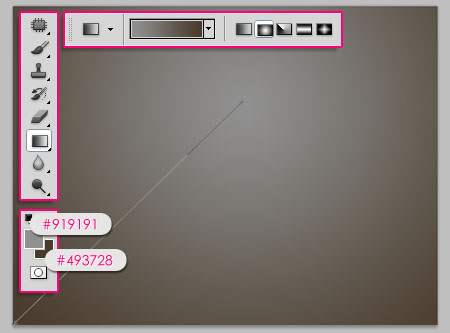
Step 1:
- Set the Foreground color to #919191, and the Background color to #493728, then, create a Radial Gradient from the top center of the document to one of the corners at the bottom.
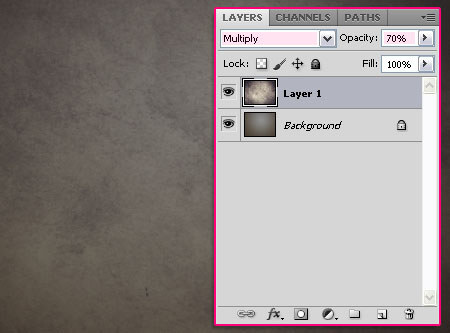
- Open the Untitled texture 66 image and place it on top of the Background layer, then change its Blend Mode to Multiply and its Opacity to 70%.
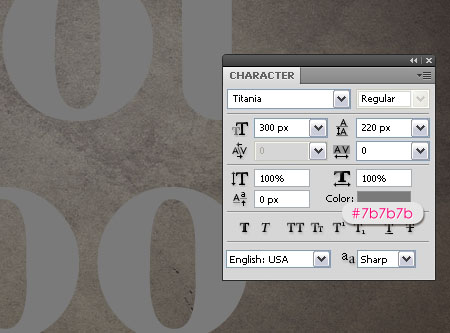
- Create the text using the color #7b7b7b. The font used is Titania, and the size is 300 px.
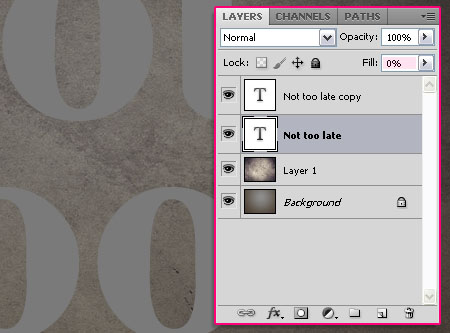
- Duplicate the text layer, and change the original layer’s Fill value to 0%.
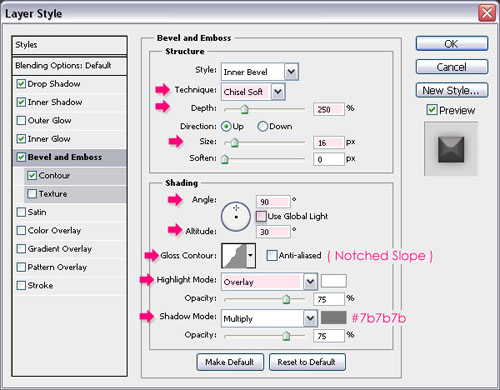
Step 2:
Double click the copy text layer to apply the following Styles:
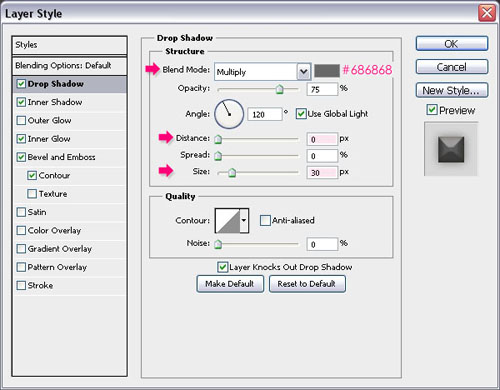
- Drop Shadow: Change the color to #686868, the Distance to 0 and the Size to 30.
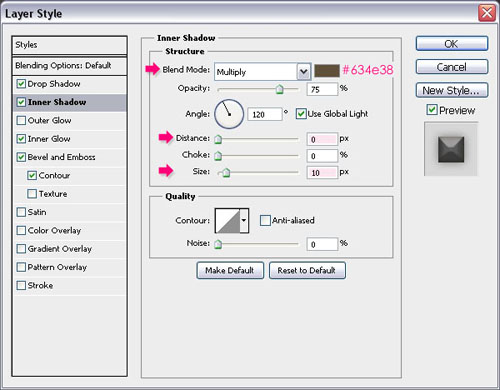
- Inner Shadow: Change the color to #634e38, the Distance to 0 and the Size to 10.
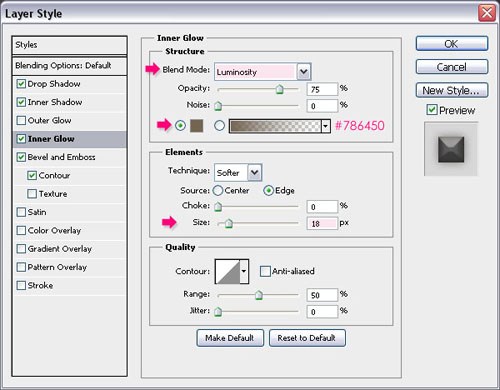
- Inner Glow: Change the Blend Mode to Luminosity, the color to #786450, and theSize to 18.
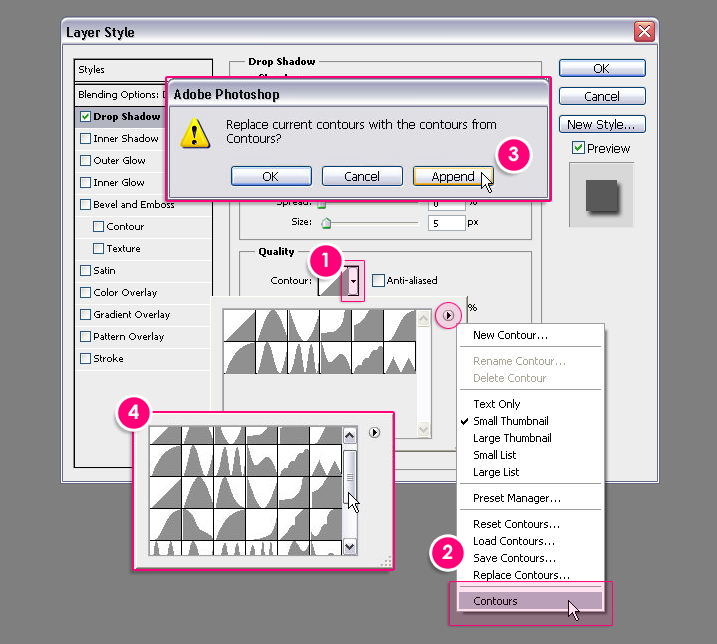
- Bevel and Emboss: Change the Technique to Chisel Soft, the Depth to 250, theSize to 16. Remove the check next to Use Global Light, and change the Angle to 90 and the Altitude to 30. Also, change the Gloss Contour to Notched Slope, the Highlight Mode to Overlay and the Shadow Mode color to #7b7b7b.
Check this image to see how to load the contours if you don’t have them.
- Contour: Just choose Half Round.
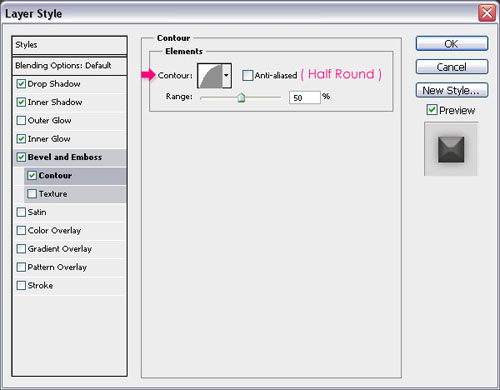
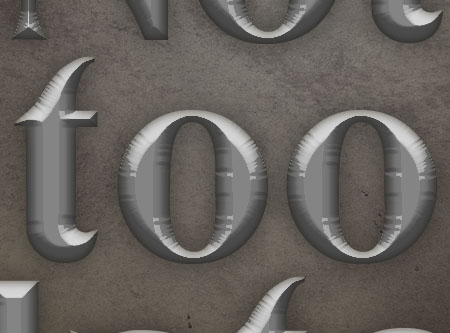
This should give the text a nice metallic look.
- Now, double click the original text layer to apply a Drop Shadow. Change the color to#6d5b4a, un-check the Use Global Light box, change the Angle to -170, the Distanceto 10 and the Size to 25.
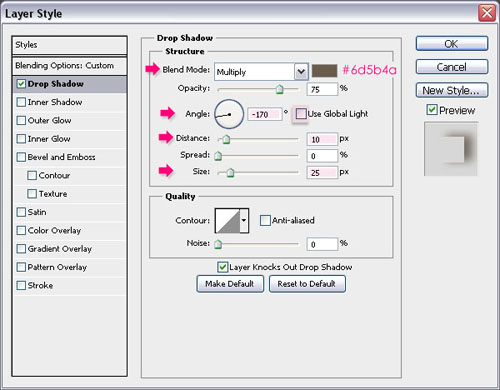
This should intensify the shadow around the text, giving it even more depth.
Step 3:
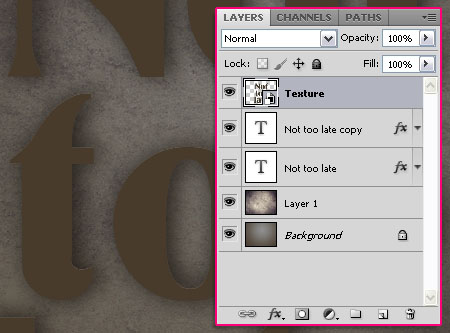
- Create a new layer on top of all layers and call it “Texture”. Press the Ctrl key and click on a text layer’s thumbnail (icon) to create a selection.
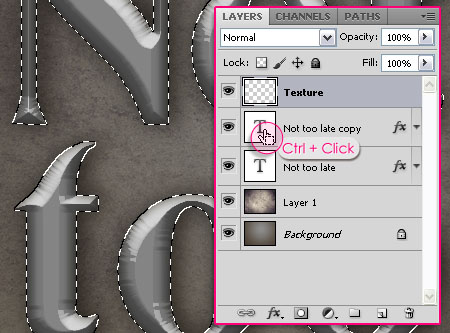
- Switch between the Foreground and Background colors, then fill the selection with the new Foreground color. Press Ctrl + D to get rid of the selection.
- Right click on the “Texture” layer, and choose Convert to Smart Object. Smart Objects preserve an image’s source content with all its original characteristics, enabling you to perform nondestructive editing to the layer. This simply means that we will be applying a couple of Filters to this layer, and we will still be able to edit the Filter’s values after applying them. This will come in handy later on.
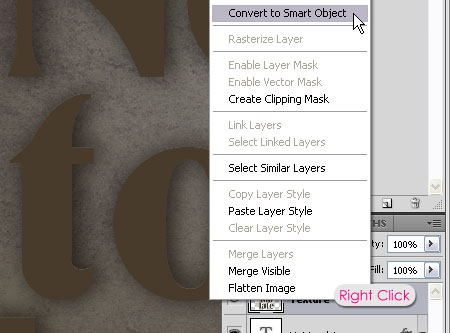
* Notice the small icon that appears at the bottom right corner of the layer.
Step 4:
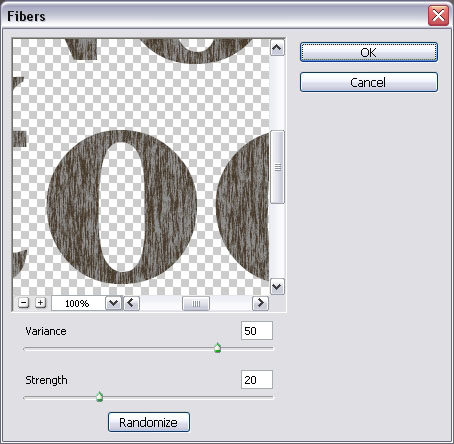
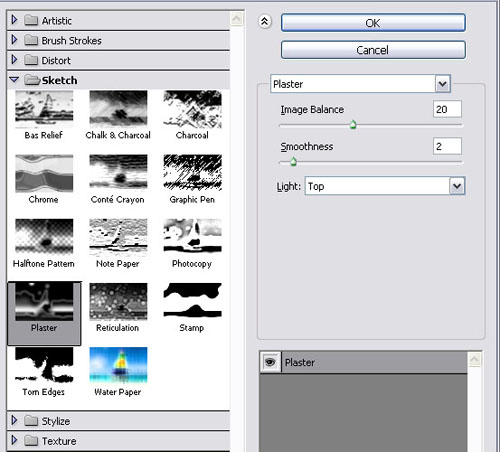
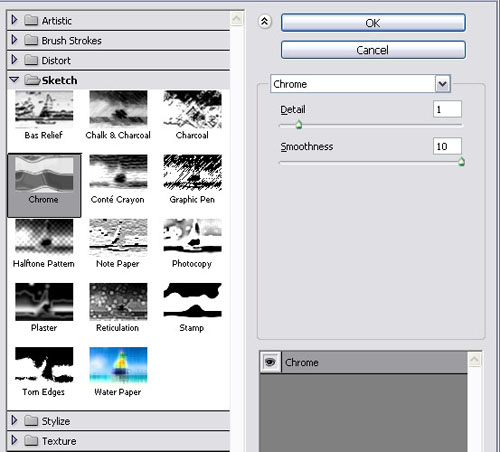
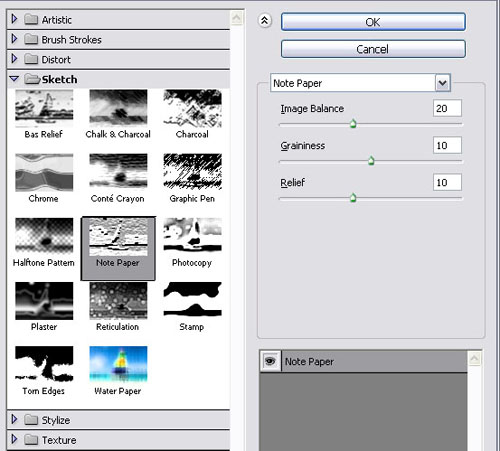
Change the values for each Filter as shown in the images below:
- Start by going to Filter -> Render -> Fibers:
- Filter -> Sketch -> Plaster:
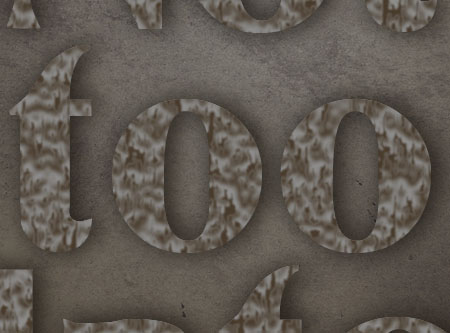
- Filter -> Sketch -> Chrome:
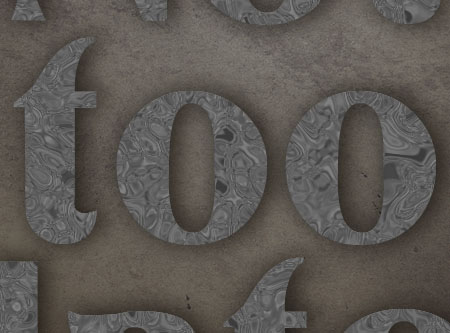
- Filter -> Sketch -> Notepaper:
* You can click the small arrow on the right of the “Texture” layer to expand the list of filters used, and then double click on the name of any filter to change its values. You might need to change the values for both the Chrome and Notepaper filters if you are using a different font or size for your text, or if you would like to see how the different values affect the final result.
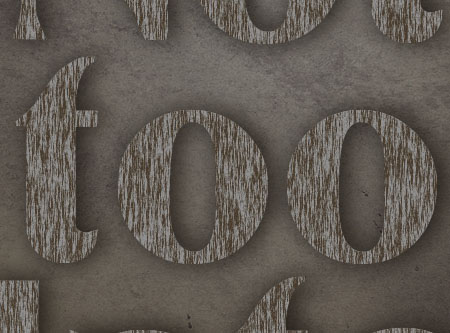
After applying the Filters, change the “Texture” layer’s Blend Mode to Multiply.
Step 5:
- Duplicate “Layer 1″ and drag the copy to the top. Create a selection once again.

- Click the Add layer mask icon in the Layers panel to create a mask using the selection.
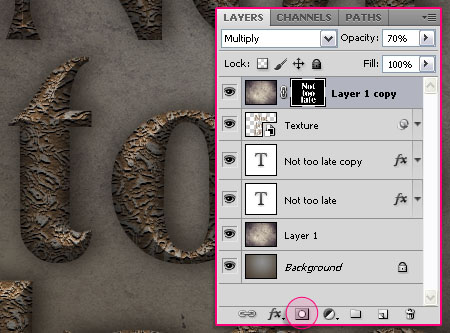
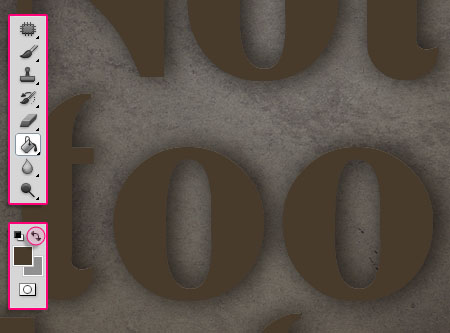
- Create a new layer right below both text layers and call it “Shadow”. Use a soft round brush, around 40 px size, to create some shadow spots. The color is still the Foreground color (#493728).
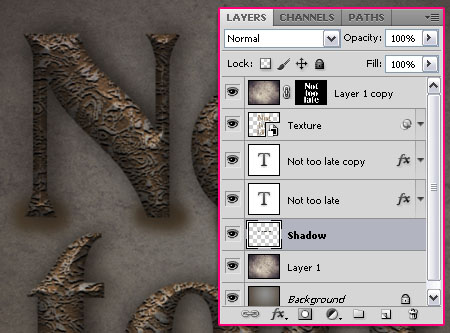
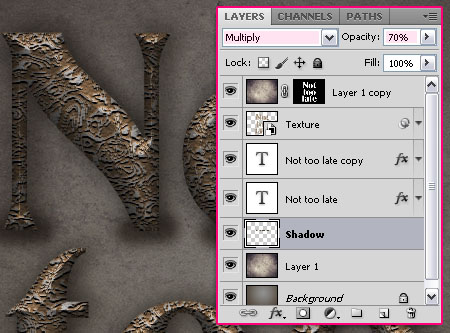
- Change the “Shadow” layer’s Blend Mode to Multiply and its Opacity to 70%.
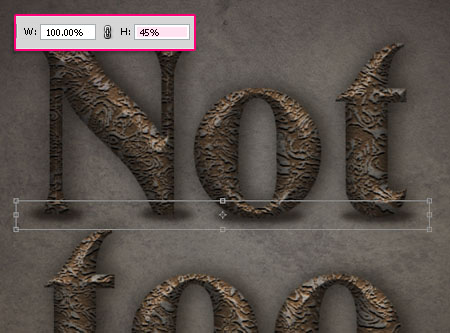
- Press Ctrl + T to free transform the spots, type in 45% in the Height box in the Options bar at the top, or any other value you like. Move the shadow if necessary, then hit Enterto accept the transformations.
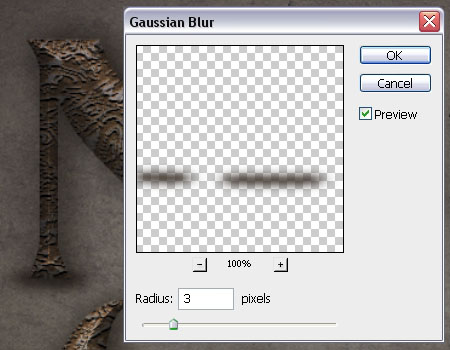
- Go to Filter -> Blur -> Gaussian Blur and apply a simple blur to the shadow you created.
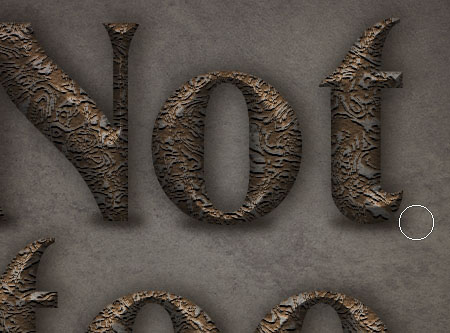
Note that you might need to do the previous steps on a separate layer for each horizontal line of text you have, then you can merge all layers in one layer.
- You can as well go ahead and erase any unwanted parts.
Step 6:
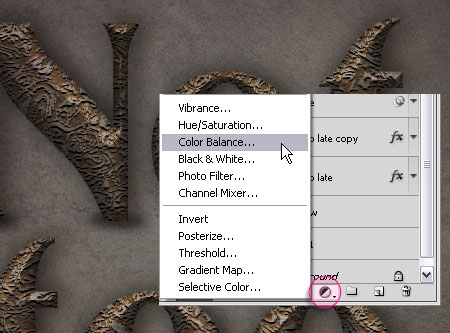
- Click the Create new fill or adjustment layer icon down the Layers panel, then chooseColor Balance.
- We are going to adjust the Highlights and Midtones values as shown below:
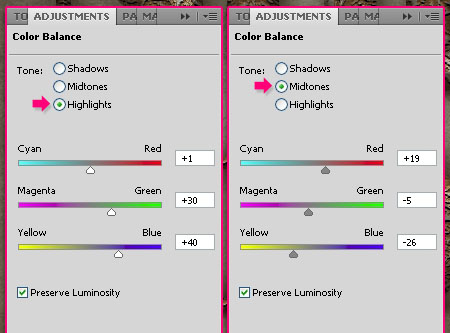
- This will add a vintage feel to the effect.
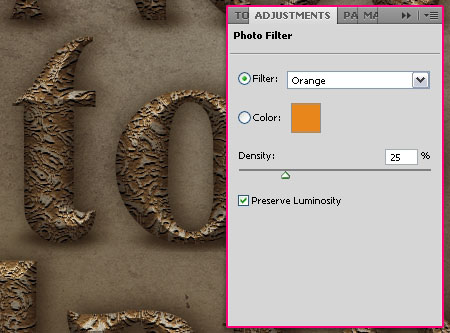
- Once again, click the Create new fill or adjustment layer icon, but this time choosePhoto Filter.
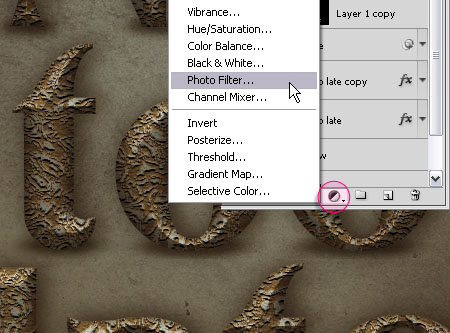
- You can see how the different filters affect the image, but right here the filter used is theOrange Filter. It gives warmth to the final effect.
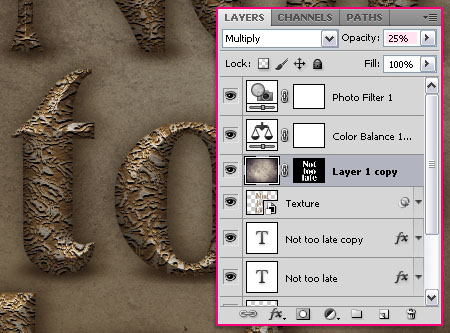
- If the text seems too dark, you can go ahead and reduce the “Layer 1 copy” Opacityvalue. Here, it is reduced to 25%.
That’s it!
copied from http://textuts.com
No comments:
Post a Comment