Step 1
Create new photoshop file of 800 x 1000 pixel filled with white background and name it Candle.
Step 2
Press Ctrl+Shift+N for creating new layer and type layer name "Candle"1. Press G to select Gradient tool
2. Make sure linear gradient is selected
3. Double click to edit gradient

Step 3
Create four color gradient of color fdbc50 - db7c26 - 8f4f21 - 704c23 as shown in the image
Step 4
Create selection for candle shape with the help of rectangular marquee tool.Press G to select gradient tool, hold left mouse button and drag from candle top to candle bottom.

Step 5
Press E to select eraser tool (brush size 80 with hardness 50) and erase from top and bottom as shown in the image. You can also use pen tool for perfect round deletion of candle bottom.
Step 6
Double click on background layer to make it normal layer and name it "background". Set foreground color to "212117", press alt+delete to fill this layer with foreground color
Step 7
Create new layer above "candle" layer and name it "flame". Now draw flame with white color using brush of size 15 with hardness 50
Step 8
Choose command outerglow from menu layer > Layer Style > OuterGlow and set parameters as follow. Use b18242 for glow color. Set spread to 7 and size to 46
Step 9
Create new layer "blue flame" above flame layer and set foreground color to 78789e and draw blue flame with soft brush. Set brush opacity to 20.
Step 10
Create new layer above "blue flame", name it "flame glow", create oval shape with elliptical marquee tool and fill with color f4b155
Step 11
Change blending mode of "flame glow" layer to lighter color. Press ctrl+d to deselect all. Appliy blur > Gaussian blur with radius of 9.5
Step 12
Create new layer namely "linen wick" above "flame" layer, set foreground color to code 35364b . Draw linen wick with soft brush (opacity 24) as show in the image.
Step 13
Select "candle" layer, press ctrl+shft+n for creating new layer, name it "shadow", make sure to click on"use Previous layer to created clipping Mask" and set blending mode to multiply . Press OK
Step 14
Select "shadow" layer, set foreground color to 854c21 , paint shadow as outline in the image below with soft Brush of size 80, with opacity 20, to give shadow to candle.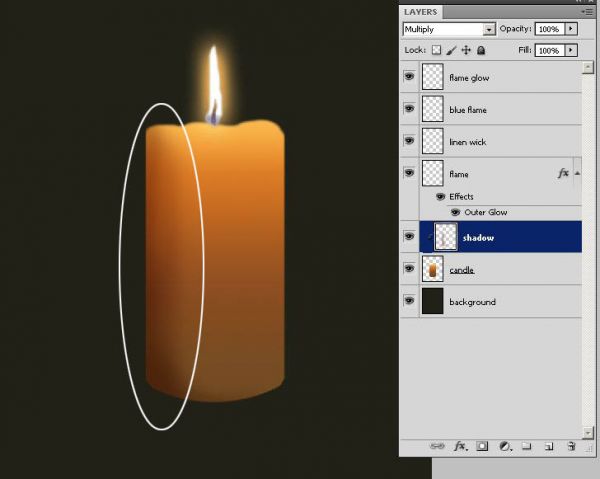
Step 15
Again select "candle" layer, Press ctrl+shift+n to create new layer, name it "highlights", make sure to click on "use Previous layer to created clipping Mask" and set blending mode to overlay . Press OK
Step 16
set foreground to color fde077, paint highlight as outline in the image below with soft Brush of size 80, with opacity 15, to give highlights to candle.
Step 17
create new layer on top of all layers and name it "highlight 02". Make highlight selection with marquee tool and fill it with white color.
Step 18
Press ctrl+d to deselct selection. Apply Blur > gaussian blur with radius 18
Step 19
Finally reduce opacity of "highlight 02" layer to 30.
Step 20
Have Fun!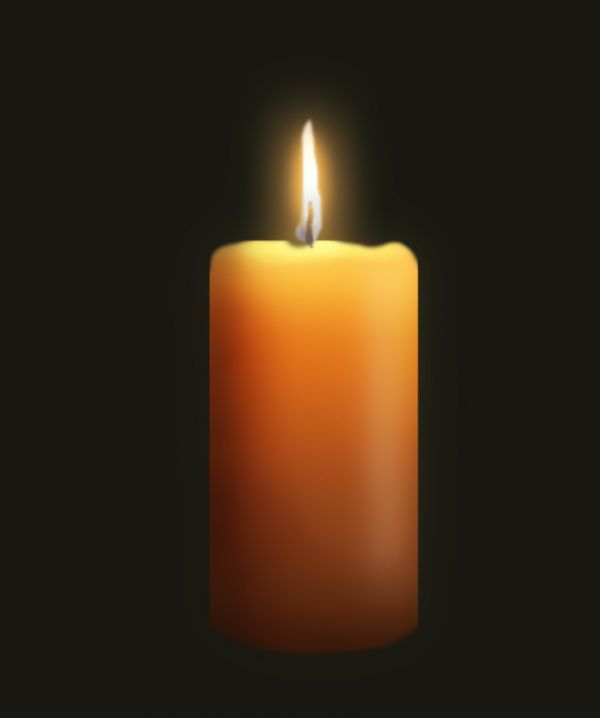
copied from
No comments:
Post a Comment